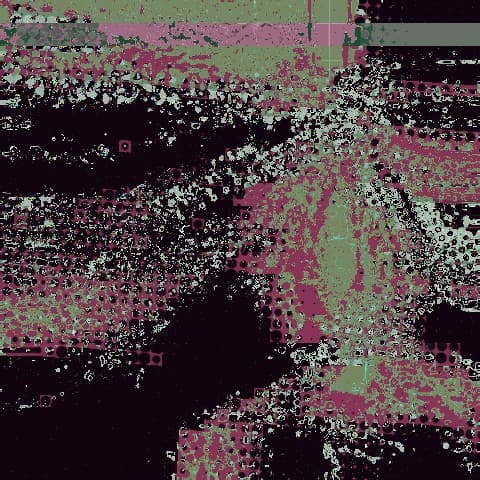
Glitch Studio turns any image into a moving, looping piece of glitch art: pixel sorting, datamoshing, VHS decay, slime mold simulations, and dozens of other effects, stacked, animated, and exported as video. It runs in your browser and all of it is free. You don't need a manual to start, you need one button. But there's a lot of machine underneath that button, and this walks through it in the order you'll actually want to try things.
Step one: press Chaos
Open Glitch Studio and give it an image. Anything works: your PFP, a photo, a logo. You'll land in the studio with your image on the stage and a panel on the right. Ignore everything except the yellow button.
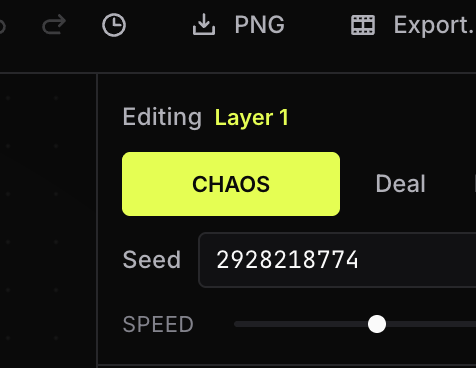
What comes back is not a filter on your image. It's already in motion: crawling, flickering, breathing, and looping seamlessly. That's deliberate. A single Chaos press builds all of this at once:
- —Two to six effects, drawn from the entire rack — every device the studio has, from tape damage to living simulations to real file corruption — with a guarantee that at least two of them move on their own. Every knob on every pick is rolled across its full range, so two presses of the same devices can still look nothing alike. Want a sparser or denser rack? The little dial next to the button pins the count anywhere from 2 to 8; on Auto it wanders.
- —A handful of wave modulations, routed onto the knobs it picked, in every waveform the studio speaks. This is what separates a filter from a thing that's alive: some of the sliders are already riding waves, and some of them sweep end to end.
- —Rhythm and structure: rolls regularly put one or more effects on beat patterns so they strobe against each other, and if you've already cut a subject mask or a depth map, a roll can aim a device at just the subject or just the background.
Don't like the roll? Press it again. Every press is a completely new universe — the studio even remembers what it just dealt you and steers the next press toward devices you haven't seen — and hammering the button escalates: hotter settings, more effects, deeper motion. Press it ten times and you'll see ten different things the studio can do without touching a single slider. The buttons next to it are variations on the same idea:
- —Deal draws a curated combination instead of a random one. It never rolls garbage, so it's the button for when Chaos keeps handing you noise.
- —Mutate evolves what's already playing: small seeded nudges instead of a fresh universe. Use it when something is 80% right.
- —Seed is the dice roll as a number. The same effects with the same seed always produce the same result, so if you land on something good, that number is your way back. Press R to re-roll just the seed while keeping the effects.
Everything runs on one clock
The stage is always playing. Under the hood, every moving thing in the studio, from a VHS tracking band to a wave riding a slider, is computed from the current frame of one shared loop window. When the window wraps, every value lands exactly where it started, so everything loops seamlessly by construction. You never have to line anything up.
The transport at the bottom of the stage plays, pauses, and scrubs through one loop so you can find an exact frame. The Speed slider under the seed scales all motion at once. And because every frame is a pure function of the recipe, the seed, and the clock, your exact result is reproducible anywhere: same recipe, same seed, same pixels.
Step two: take apart what it built
Every Chaos press fills the panel below the button with rows. That panel is the rack, and each row is one effect with its own settings. Rows run in order from top to bottom, each one feeding the next, and that stack of rows is the actual artwork; your image is just what it runs on. The fastest way to understand a rack is to dismantle the one Chaos gave you:
- —Toggle a row off and on. Now you know what that effect was contributing. Hold alt and click to solo it against the clean image.
- —Click a row and its full controls open in the inspector below the stage: every slider, plus the mask, rhythm, and motion controls covered below. Every effect also has its own help page, one click away, that explains what each knob actually does.
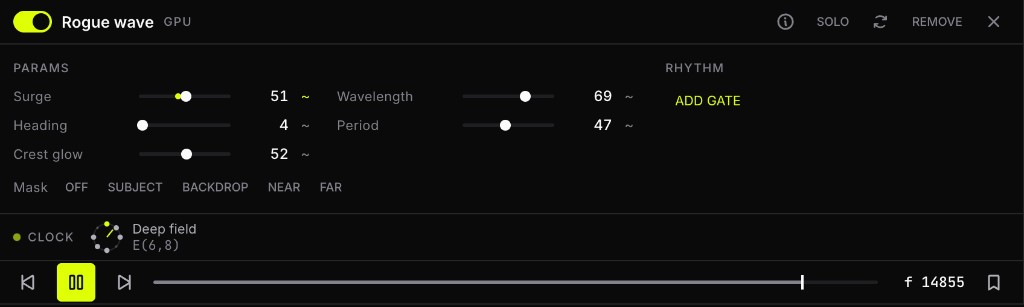
- —Look for the lit ~ badges. Those are the wave routings Chaos placed. Click one and you can see which wave is driving that knob, retune it, or take it off.
- —Drag rows to reorder them. Order matters: pixel-sorting a posterized image looks nothing like posterizing a pixel-sorted one.
When you're ready to add rows on purpose, the effect browser is organized into families with honest names: Warp & melt (smears, warps, displacement), Lens & optics (kaleidoscopes, mirrors, bulges, tiles, shakes, and jitters), Math & maps (attractors, Chladni plates, cardioids), Emergence (Physarum slime mold, Lenia, turmites, little living systems that eat your image), Spectra (RGB splits, phase ghosts, diffraction), Real corruption (JPEG crush, datamosh, PNG bend: these break the actual file format, which is why they look like real broken files), Possession (effects driven by a second image), Print & pop (halftones, screenprints, duotones, misregistered plates, paper stock), Color & light (grades, glows, strobes, hue spins, vignettes), Surface & signal, and Analog & film (CRT, Super 8, light streaks). Hover anything in the presets rail and it auditions live on your actual image before you commit.
The four macro knobs
Above the rack sit four knobs that lean on every active row at once: Heat (how hard everything hits), Drift (how fast everything moves), Order (up calms jitter and noise), and Ghost (trails, echoes, afterimages). They're non-destructive: the middle position is hands-off, and the underlying settings never change. Worth knowing: Chaos deliberately pushes Drift up and Order down on every roll, so if a roll is the right look but too frantic, pull Drift back and push Order up before you touch anything else. Half the time that's the whole fix.
Step three: steer the motion
Chaos routes waves for you, but the system it's using is fully yours. Next to every slider in every effect there's a small ~ button. Click it and that slider stops being a number you set and becomes a number that moves, riding a signal source you pick. This is the deepest part of the studio and the one that pays off the most.
The signal sources come in three flavors:
A good first exercise: take a roll you like, find its most dramatic slider, and put a slow sine on it with a wide range. Then tighten the range until the movement stops screaming. Most of what makes a loop feel expensive is exactly that: one or two parameters moving with intent instead of ten moving at random.
Rhythm gates
Motion doesn't have to be continuous. Every effect row has a Rhythm section in its inspector: add a gate and the effect pulses on and off in a pattern instead of running constantly. You set how many pulses land across how many steps, rotate the pattern, and swing it. It's drum programming for destruction: a datamosh that hits on the beat reads as intentional in a way a constant smear never does. Active gates show up as small rings around the clock so you can watch the pattern turn.
And once a loop is close, Roll 12 earns its place: it renders your current stack under twelve different seeds, side by side, and you click the best one to keep its seed. It's a finishing tool, not a starting one. Rolling twelve variations of a stack you don't like yet just gives you twelve things you don't like.
Step four: aim it
By default, effects hit the whole image. The Masks panel is how you aim: it can build a depth map of your image, lift the subject off the background, or segment anything you click on, using AI models that run in your browser.
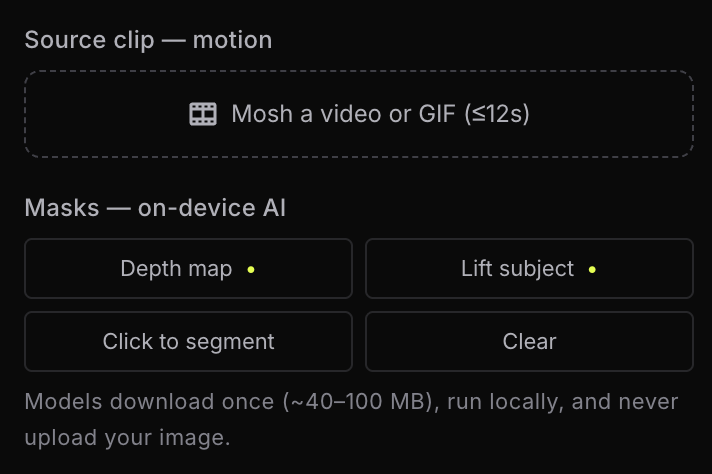
Once a mask exists, every effect row grows a Mask gate with Subject, Backdrop, Near, and Far options. That one row is the difference between noise and a deliberate piece: melt the backdrop while the face stays clean, or pixel-sort only what's far away.
Step five: feed it more images
Your source isn't the only image a layer can hold. There are three more slots, and each one does something different:
Layers, elements, text, and paint
The left rail stacks layers, and this is where compositions happen. Each layer carries its own rack, its own seed, and its own image slots, so a background can run slime mold while the subject on top gets a clean RGB split. Hide or solo layers while you work, and set the canvas size independently of any source image — each layer then decides how it maps into that canvas: Fill covers and crops the overflow (drop a square image over a wide video and the square wins), Fit letterboxes the whole image in, Stretch ignores aspect entirely.
Inside a layer, content is built from elements: images, text, shapes, and paint, each with its own position, scale, rotation, and opacity. They compose into one surface before the layer's rack runs, so a photo, a caption, and a scribble all get devoured by the same effects together. The toolbox on the left edge holds the tools: Move (V), Brush (B), Text (T), Shape (U), place image, and new layer, with the hand and zoom below. Click an element on the canvas to grab it, drag the handles to place it, and Esc steps back out to the layer. The rows nest under the layer in the left rail — reorder, hide, or delete them there.
- —Transform. Press V or click the image and you get drag, scale, and rotate handles right on the stage — for the layer, or for whichever element you clicked. The rack renders first, so scaling never re-bakes your effects.
- —Text. Type anything, pick a font, and it rasterizes into the layer's surface and runs through the rack like any other pixels. Every effect chews on the letterforms, which is the fastest way to make a title card that matches the piece. Double-click text on the canvas to edit it in place.
- —Shapes. Press U (or open the shape flyout in the toolbox) for rectangles, ellipses, triangles, stars, and lines — vector shapes with fill, stroke, and stroke width, so they export crisp at any size. Frame a subject, block in a color field, then let the rack tear into the geometry.
- —Paint. Press B and paint with hard, soft, airbrush, chisel, and spray brushes, ink opacity, and swatches. Strokes smooth as you drag, and shift-click rules a straight line from wherever the last stroke ended. Strokes live in their own paint element — the photo underneath is never touched, the eraser only erases your own ink, and you can move, hide, or delete the strokes later like anything else. Your ink also auto-saves a moment after every stroke, so nothing is lost if you wander off mid-painting.
Glitching video
Sources don't have to be stills. Attach a video clip or a GIF and the whole rack runs over the motion, every frame feeding the effects. A boring three-second phone clip with a datamosh row and a rhythm gate comes out looking like recovered footage. Everything else in this article still applies; the source just moves now.
Keeping what you find
Chaos-driven workflows have one enemy: losing the good one. The studio has four layers of defense, from quick to permanent:
- —Undo everything. Every slider drag, every roll, every reorder is one Cmd+Z away, and the History panel lets you jump straight back to any earlier state instead of stepping.
- —Pin snapshots. Pin the current look and it lands in a tray of thumbnails under the stage. Click any pin to return to it. It's the comparison tool: pin three candidates, flip between them, keep the winner.
- —Save presets. A rack you'd use again can be saved to your presets rail, or written out as a .recipe file that anyone can load onto their own image.
- —Share links. The share button packs your whole stack into a URL. Looks travel, images don't: whoever opens it gets your recipe applied to their own source.
And when you know what you want, stop clicking through panels: Cmd+K opens a command palette with every effect and action by name, Tab hides all the chrome, and ? shows the full shortcut sheet.
Step six: take it with you
The PNG button grabs the current frame as a still, and C copies the frame straight to your clipboard. Export handles motion:
Loops run 2 to 12 seconds with a seamless-loop option, and the dialog ships sensible presets: a 1080p 30fps file sized for social (platforms re-compress everything, so this usually beats uploading a monster), a 2048px 60fps master, and a small GIF. Rendering happens on your machine, so there is no queue and no fee. Sessions autosave as you work.
That's the whole path: image in, Chaos until something interesting is moving, pull Drift back if it's frantic, aim it with a mask, export. Open Glitch Studio and press the button.